Getting started
From an empty account to your first sale
Six steps, in the order you will actually do them. Cards come in, get priced, get labelled, go out where people can see them, get sold, and land in your numbers. Every screenshot below is the real thing.
Add your cards
Everything starts in the processing queue. Cards land there first, and nothing is sellable until you move it out.
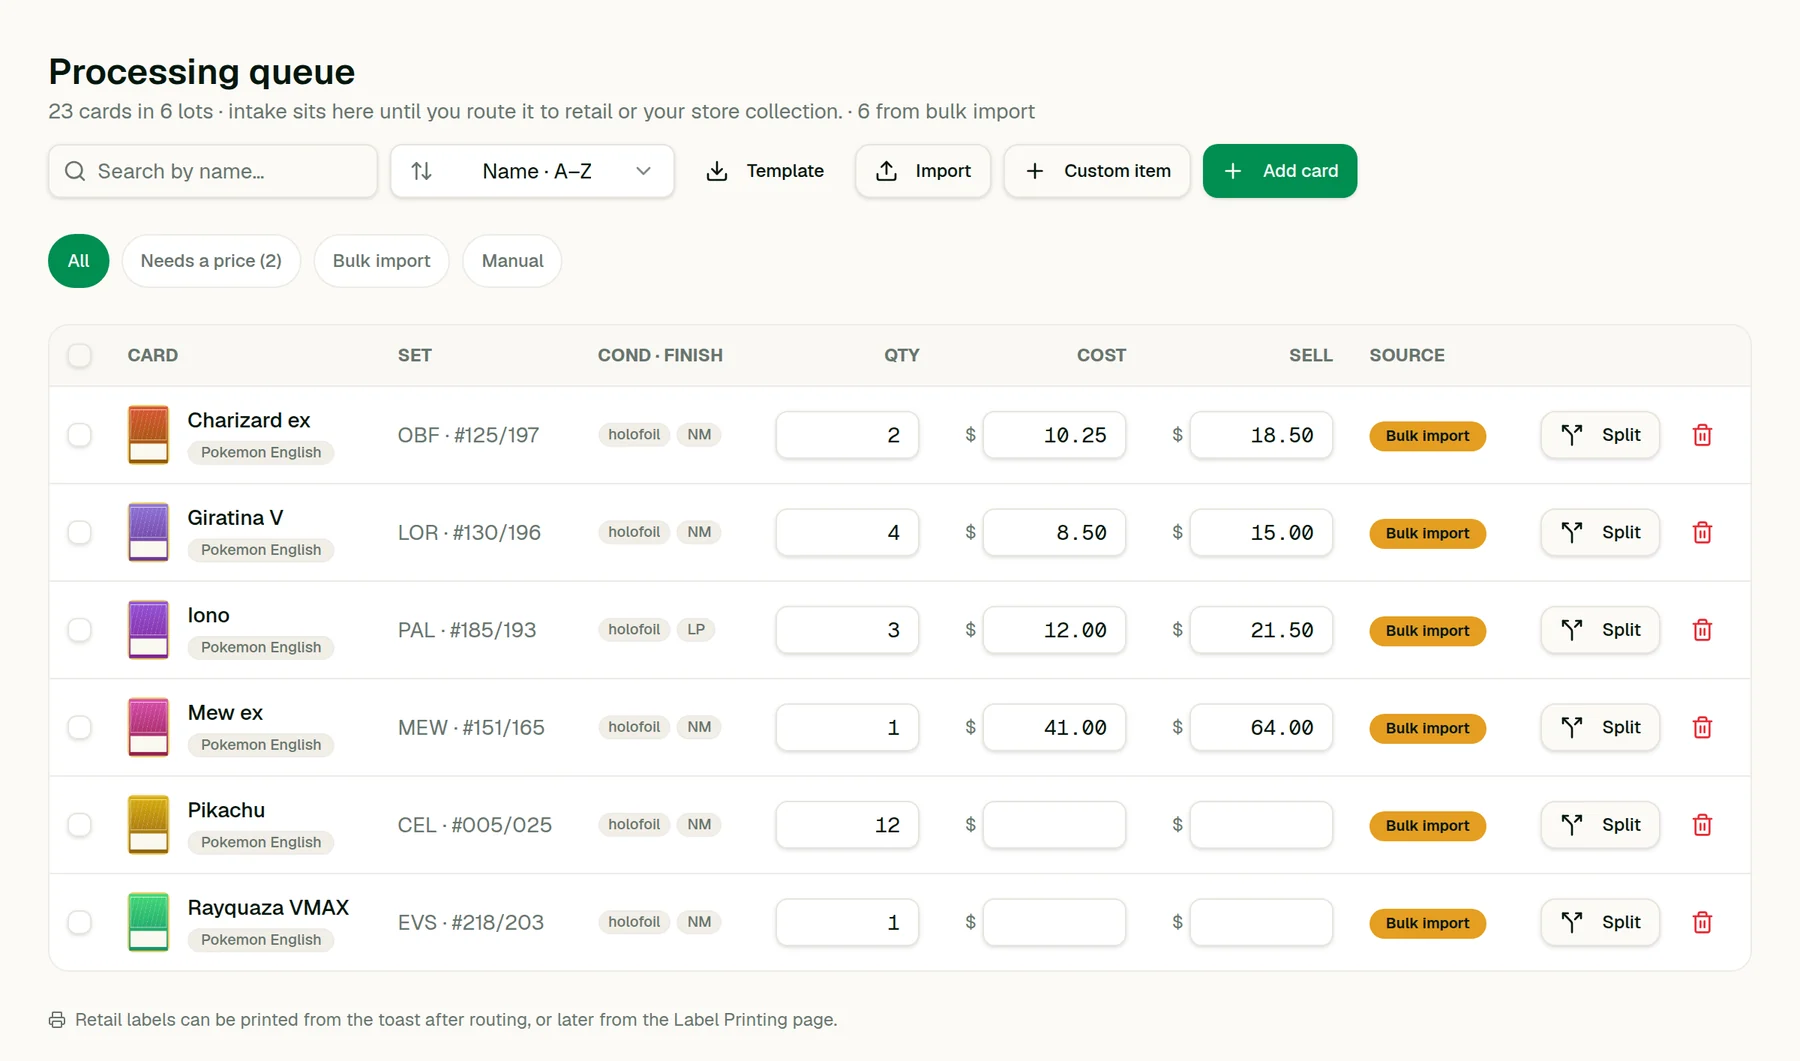
If you already have a spreadsheet — and most vendors do — start with Import. Download the template first so the columns line up, paste your rows in, and upload it. Names, sets, conditions and quantities come across in one go, and anything the importer cannot match is flagged rather than dropped.
Importing a few hundred rows takes about as long as making coffee. It is the fastest way to get from an empty account to something worth pricing.
You are done when: Your cards appear in the queue with a count in the sidebar.
Other ways in
- Add card
- Search the catalog and add a single card. Best for the one-offs you pick up between shows.
- Custom item
- For anything not in a card catalog — sealed product, supplies, graded slabs with your own details.
- Buy Cards
- Buying a collection over the counter. Build the offer, pay it out, and the cards arrive in the queue costed.
- Trade Desk
- Two-sided trades. What you take in lands in the queue; what you give up leaves your catalog.
Price them
Two numbers per card: what it cost you, and what you are asking. Both are editable straight in the table.
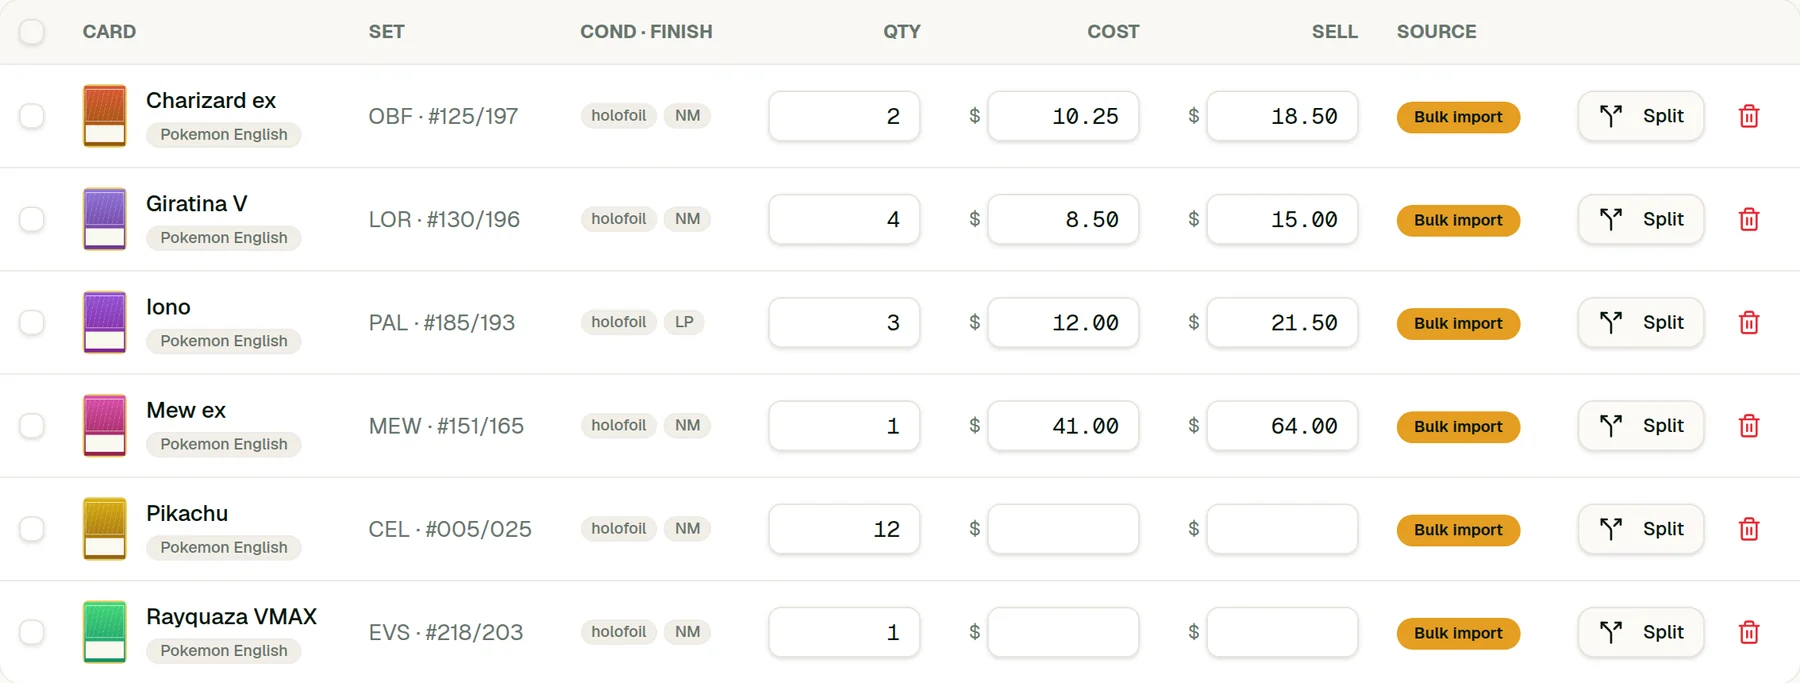
Cost is the one people skip, and it is the one that matters later. Vendr snapshots it onto every sale, so profit and margin in your reports are real figures rather than guesses. A card with no cost still sells — it just shows up as uncosted in the numbers.
The Needs a price filter pulls up everything still blank. Work through it, then select the priced rows and move them to your catalog. That move is the commit: it books your spend and makes the cards sellable.
You are done when: The queue empties and the same cards appear in your catalog.
Label them
A barcode on every card is what makes checkout fast enough for a convention rush.
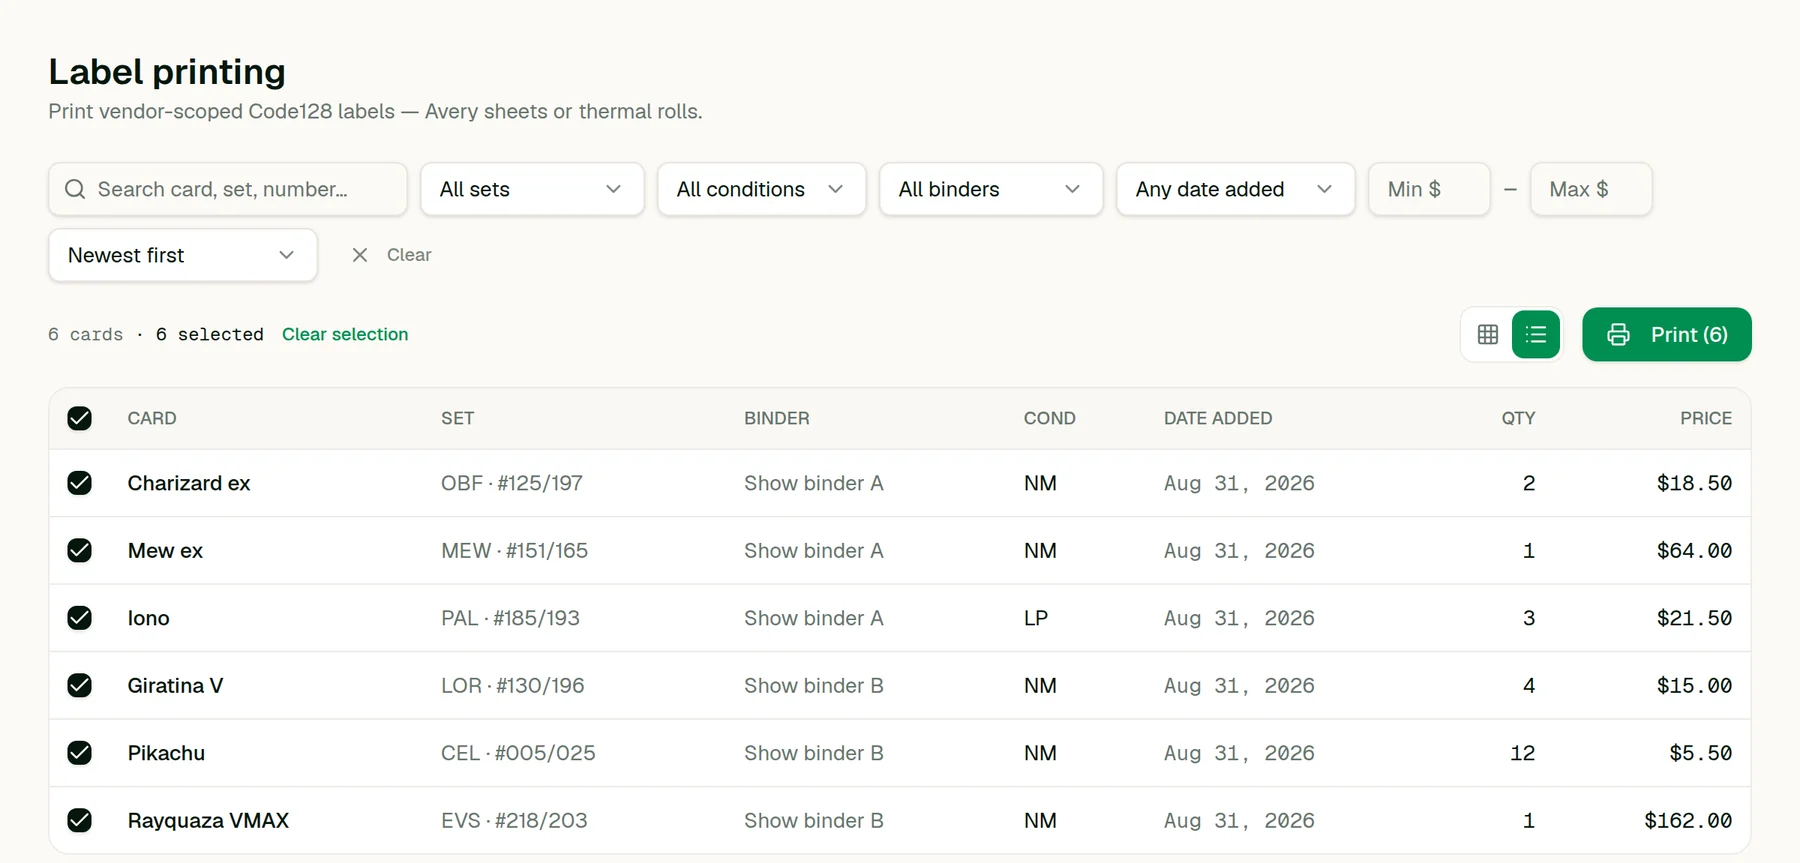
Pick the cards you are putting out, then print. You get Code128 labels sized for a thermal roll or laid out on an Avery sheet, and each one carries the price and the card name so a customer can read it without asking.
Barcodes are scoped to your store, so nobody else's labels can ring up on your till — which matters when you are sharing a hall with thirty other vendors.
You are done when: Every card in your case has a barcode you can scan.
Put it where people can see it
Your storefront is a public page showing live inventory. Turn it on, print the QR, tape it to your table.
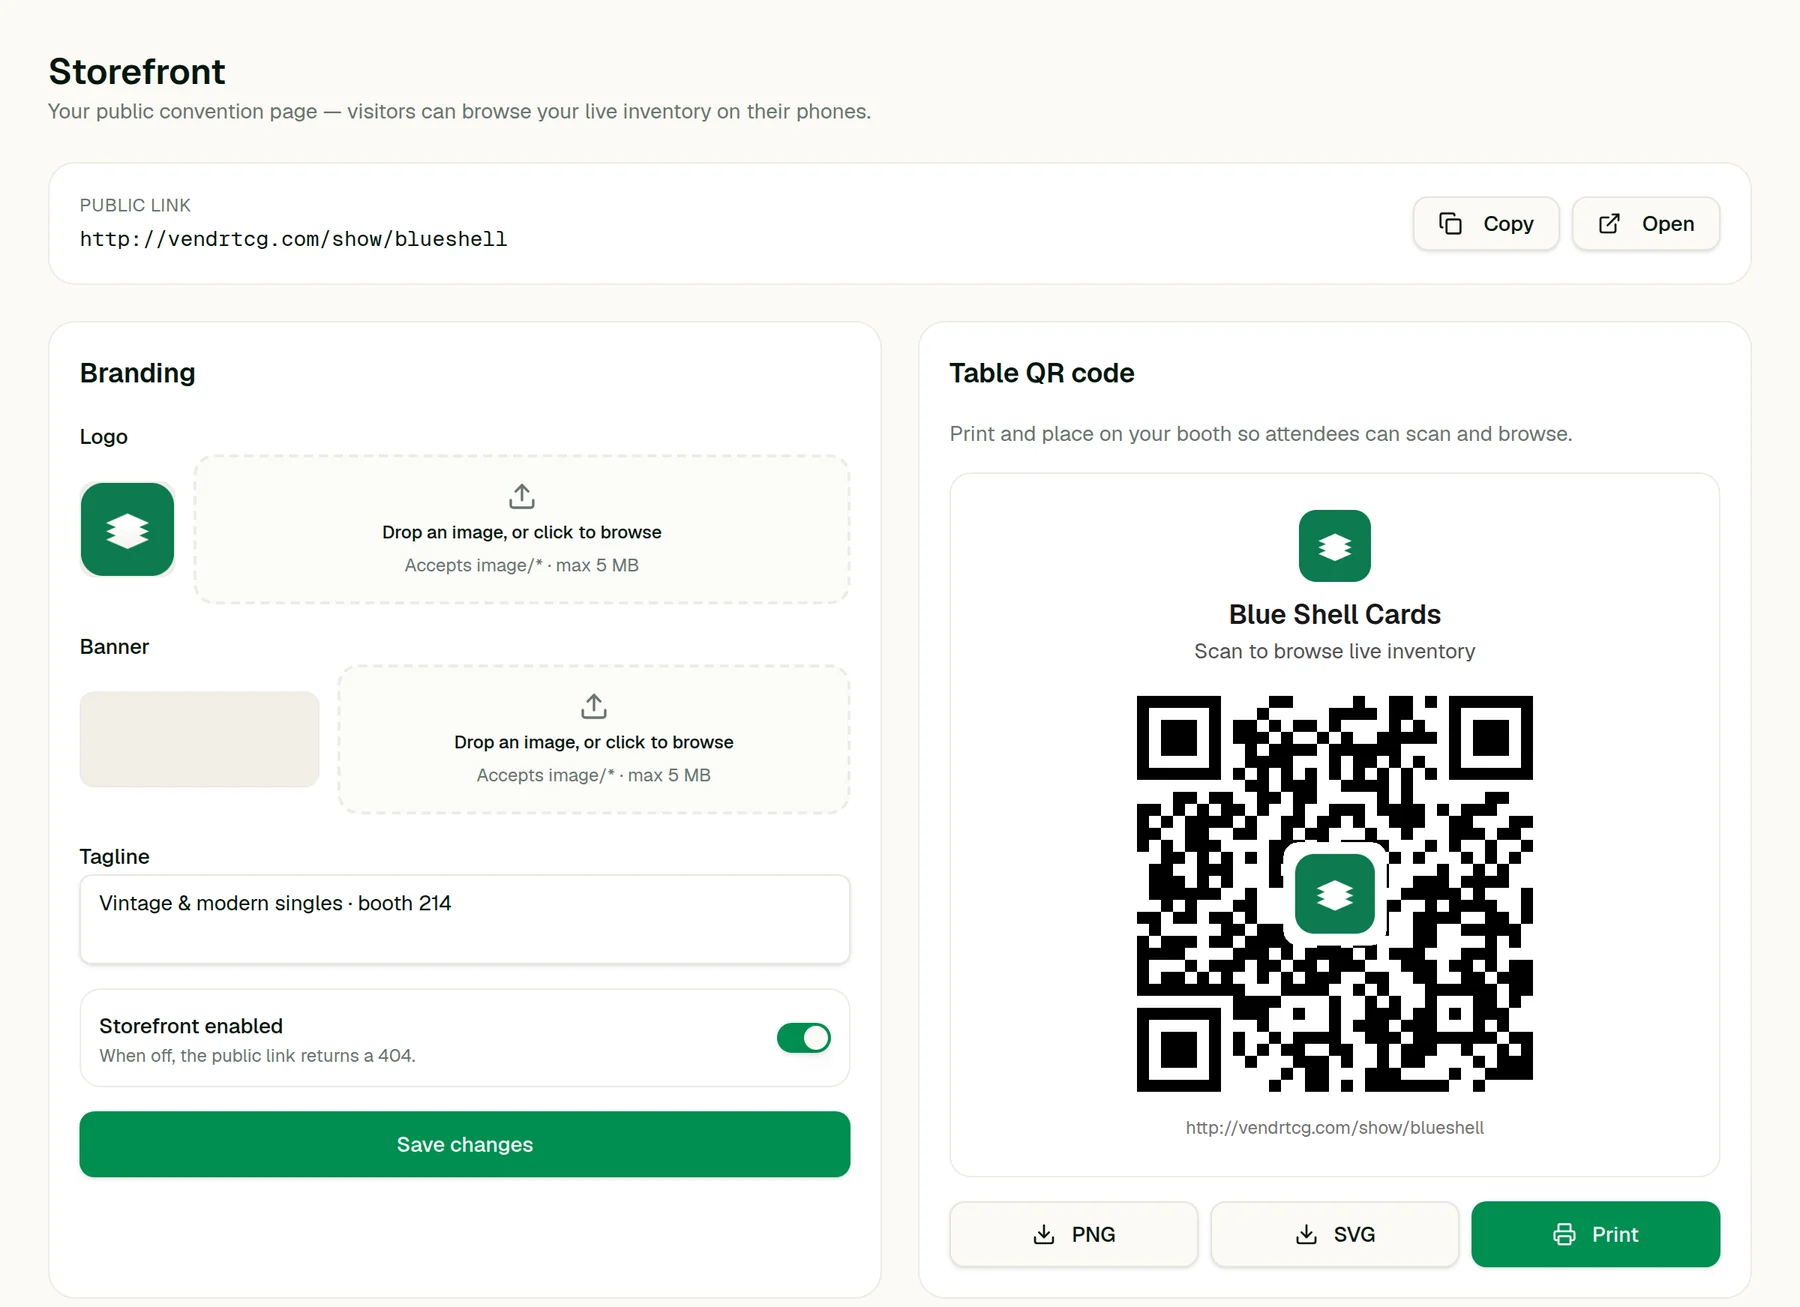
Attendees scan the code and browse everything you have on their own phone, priced and in stock, while three other people are already at your table. It cuts down the how-much-is-this queue and gives people something to look at while they wait.
The page reads straight from your catalog, so it is current the moment a card sells. Add a logo and a tagline and it looks like your booth rather than a generic listing.
You are done when: Your public link loads on a phone and shows your cards.
Sell
Scan a label, take the money. Stock comes down as you go.
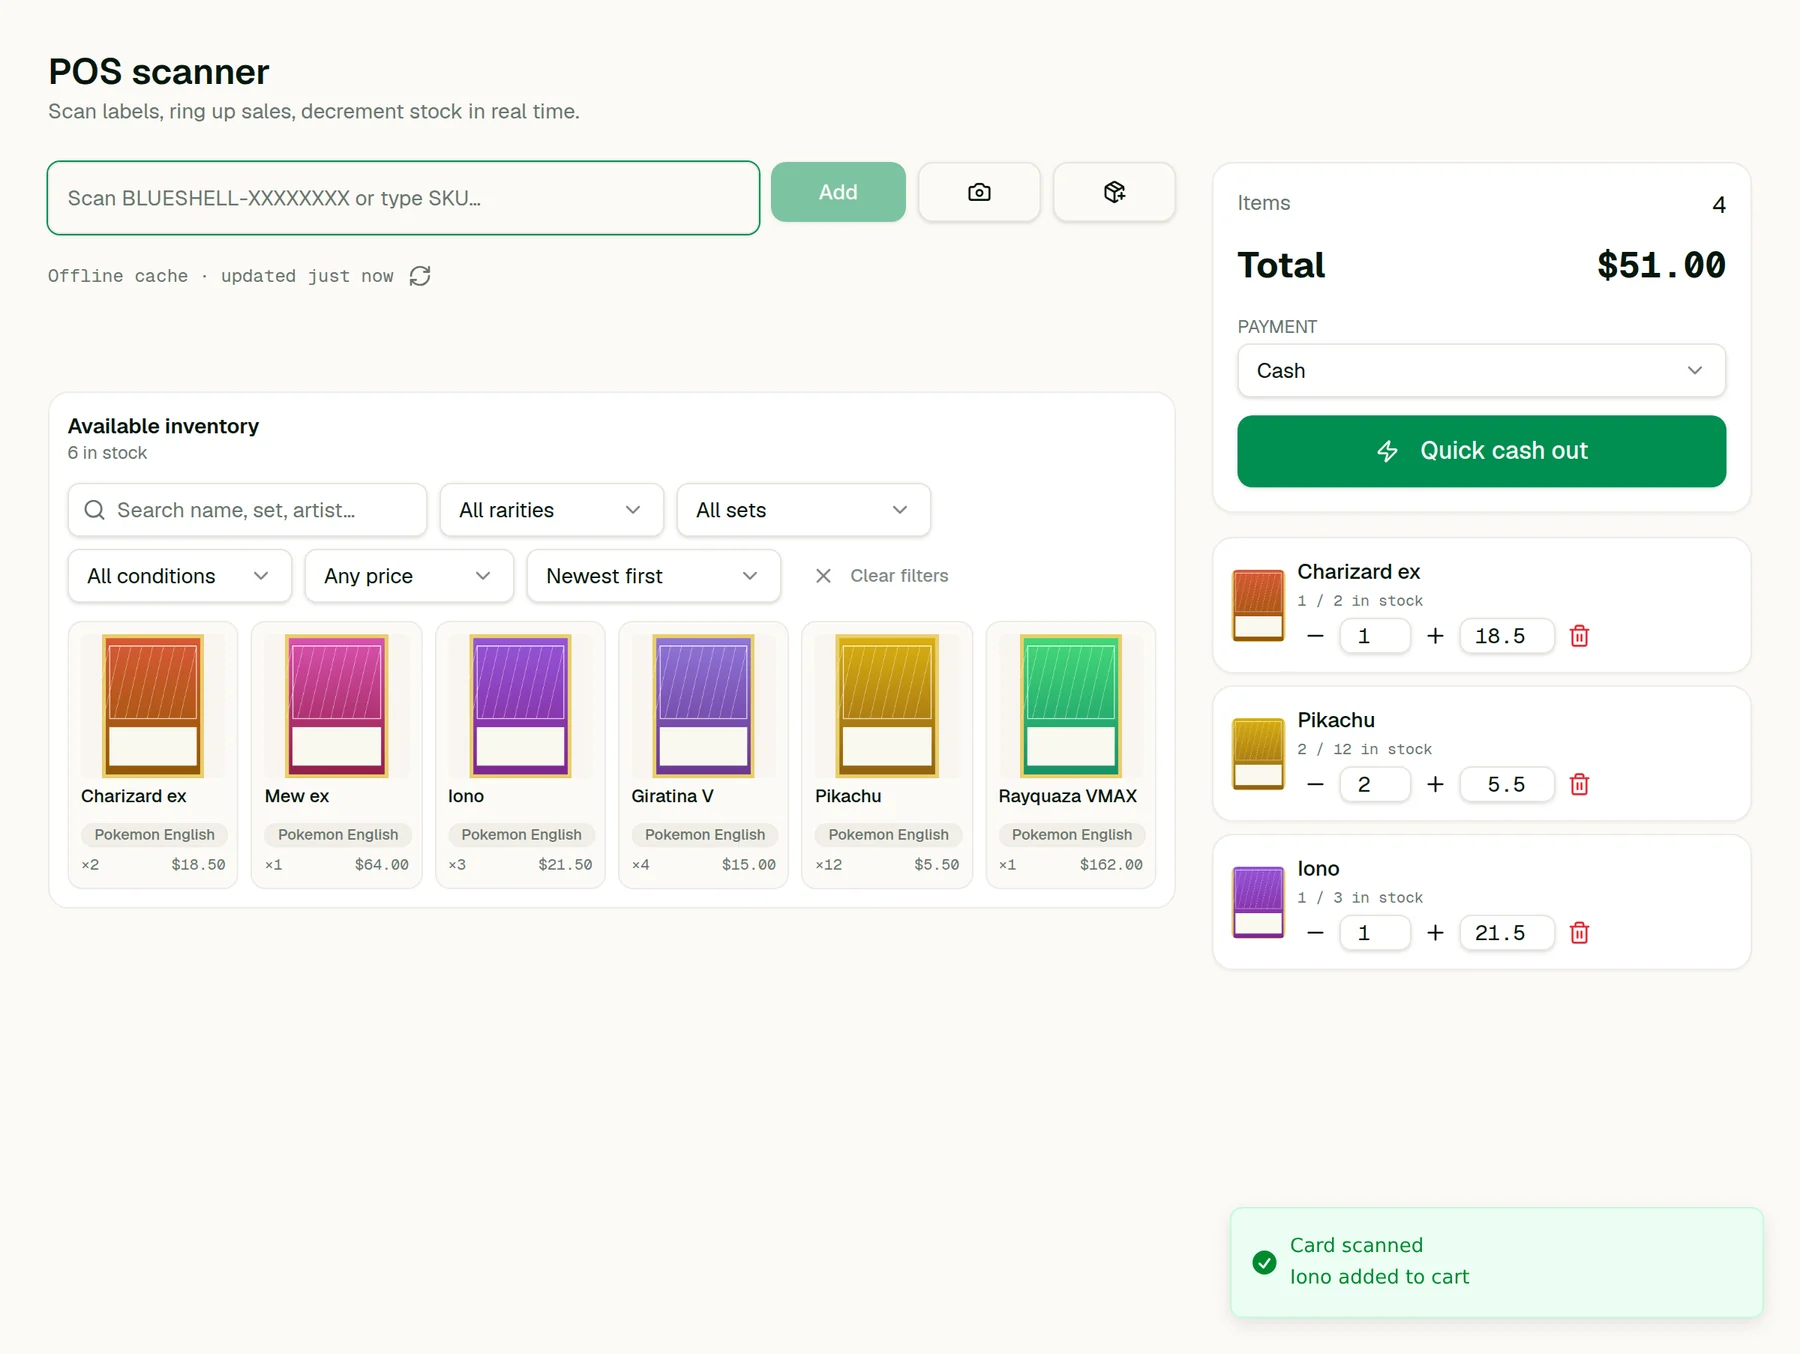
Point a scanner at one of your labels or type the SKU, and the card drops into the cart. Quantities adjust in the cart, payment method is one dropdown — cash, digital or store credit — and cash out records the sale.
Stock decrements as you ring up, so you cannot oversell the last copy during a rush. If the venue wifi gives out, the scanner keeps working and syncs when you are back.
You are done when: The sale is recorded and your catalog quantity drops.
See what the show made
Sales, payouts and net profit for any date range, with cost of goods already taken out.
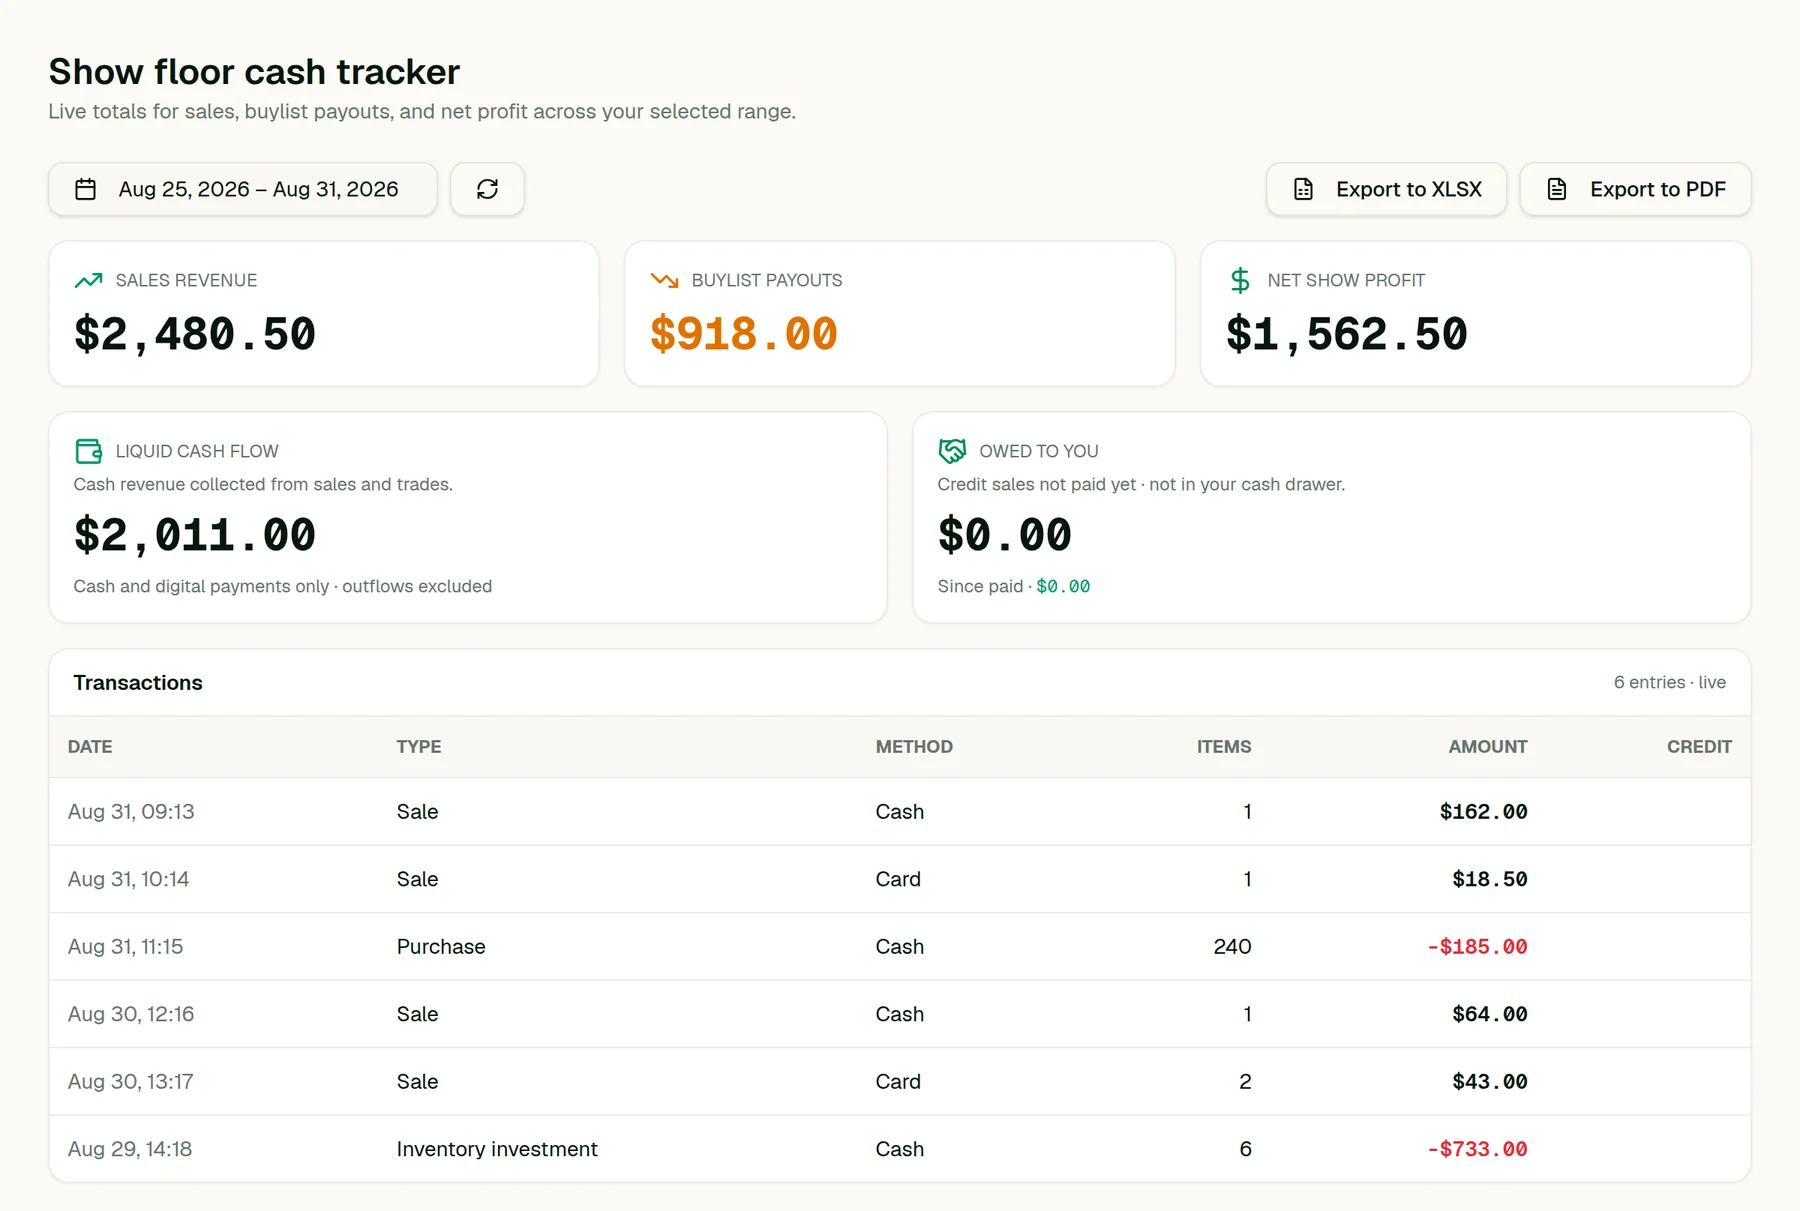
Because cost travelled with every card from step 2, this is the real number rather than gross takings. Pick the days of the show and you get what came in, what you paid out on buylist, and what is left.
Export to XLSX or PDF when you need to hand it to someone — an accountant, a business partner, or yourself in six months trying to remember whether that convention was worth the table fee.
You are done when: You know whether the show was worth doing again.
That is the whole loop
Creating a store takes about a minute, and the free plan covers intake, pricing, catalog, storefront and checkout. Labels, camera scanning, the buylist calculator and reporting come with Pro — there is a free trial when you want to try them.
Create your free accountNo card required · read the full docs